
Fridge Magnet Tutorial
 It's tutorial time! YAY! I was finally able to get this tutorial done, despite the lousy weather making it nearly too dark for photos.
I actually discovered this idea on Pinterest, which is where all good ideas wind up eventually. I wanted to share my own take on it with you.
So here we go, Fridge Magnets from super cheap clothes pins...
First you'll want your supplies:

1. Clothes pins - cheap ones from Walmart are fine. They were $1 for 50.
2. Paper - I'm using scrapbooking paper, which is akin to card stock as well as wrapping paper.
3. Peel & stick magnet sheets from Joann's. It was 2 sheets of 4"x 6" for $2.
4. Cutting tools - I used a scissor, a paper cutter, and an Exacto knife.
5. Mod Podge & a paint brush
6. Various embellishments
7. Hot glue gun and crazy glue to attach various embellishments
The only thing I had to shop for especially for this project was the clothespins; everything else I had around house from previous craft projects. The wrapping paper came around a gift from my sister-in-law and I've been saving it. I really love it!
Now that I've got the supplies out I'm ready to begin. You'll want to check out my super exact measurement system for getting the paper to be the right size for the magnet.
 |
| Exacto? Uh, nope-O! |
For the wrapping paper I laid the clothes pin down and used the Exacto knife to trim around it. Not very scientific at all.
Proceeding with the wrapping paper clothespin, I'm going to Mod Podge the surface of the clothes pin, and then put another coat of Mod Podge on top of the paper.
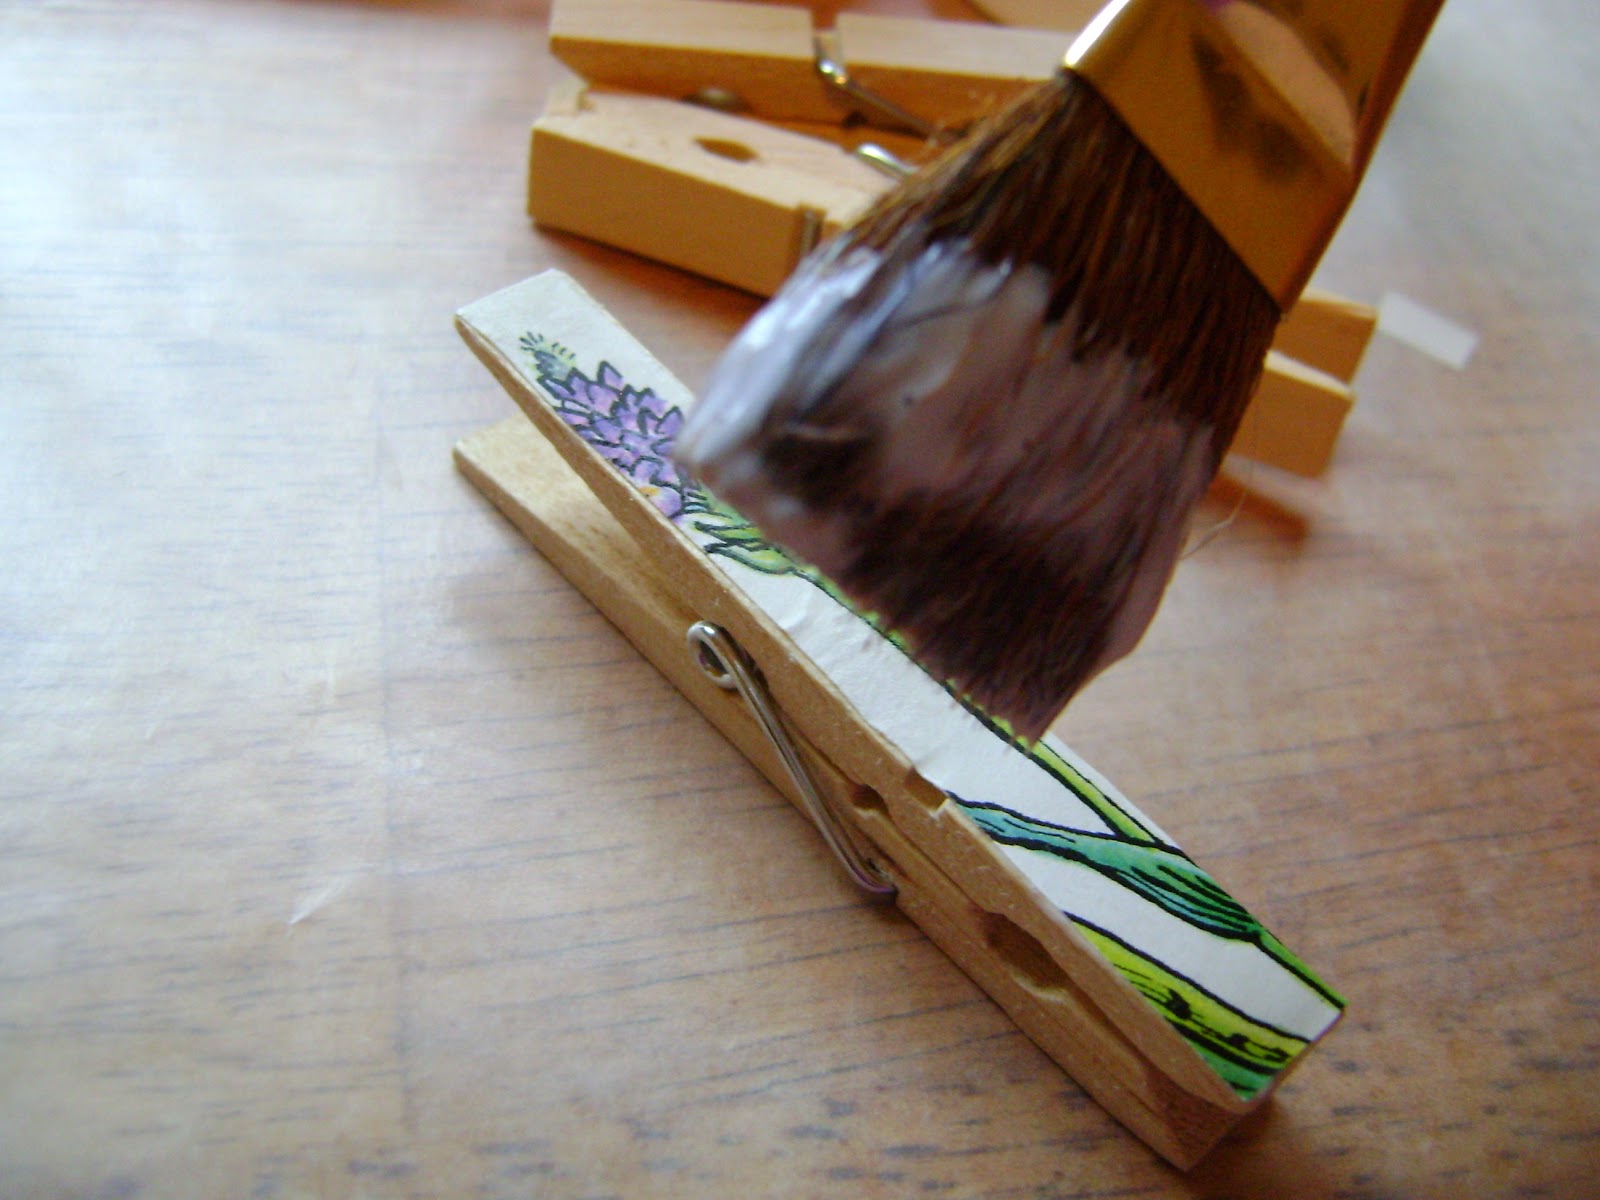 |
| This is not the best brush for Mod Podge |
Notice the divot in the clothes pin? Since this is only paper thin (no pun intended) I can trim it after the Mod Podge dries.
 |
| It's a divot. |
I used my finger and a bit of Mod Podge to smooth out those wrinkles you see above.
While that one is drying, I'll move on to the scrapbook paper, which gets treated differently because of it's thickness.
For the card stock scrapbook paper I used a much more precise method of measurement. As you can see here:
 |
| Yep there's a ruler on the guide bar, but I'm not using it. |
In my typical "eye ball it" fashion, I've laid the clothespin on the paper so I know about how wide to trim. If I were doing this as a gift, would I be more exact? Nope. I'm a pretty good "eye-baller". ;)
Now that I have the paper cut, I'm going to lay the clothespin on top and trim the ends and/or edges if necessary.
 |
| Ends are trimmed! |
Now. We have to deal with the gap. The gap I'm referring to is the little concave area where the hardware nestles. This can either be covered by the paper or the span can be clipped. If you clip it, you can see that it's a clothespin and everyone will know how clever you are that you made a magnet from such a dreary doodad!
 |
| Mind the gap! |
Since the scrapbook paper is already thick, I will not wait until the Mod Podge is dry to clip it. I have tried doing this both ways and will tell you that it was a terrible pain in the neck to try to cut through after the the Mod Podge dried. So, instead...
 |
| Keep minding that gap! |
The next step is to Mod Podge this one too and then let it dry. While they're all drying it's time to look over the embellishments I've collected.
 |
| Bits and pieces |
Through the magic of blogging, my pins are dry and it's time to break out the glue gun. Here's a clothespin that hasn't been trimmed and is getting a flower!
 |
| Hot glue is hot. Be careful! |
In retrospect I would have used epoxy I think, the hot glue was super stringy and great wisps of it wound up everywhere, even on the camera. Let's not tell the hubby that though! ;)
 |
| A crocheted flower with a bead center. |
While I was at it, I thought I would try gluing some embellishments to a tagua nut I had lying around.
 |
| Hot glue on metal is hotter than you think! Be extra careful! |
I didn't quite burn my fingers, but it was hotter than I anticipated. Next I used my large crochet flower and some seed beads.
 |
| Surprisingly neat looking in the end. |
Now that everything's dried, it's time to apply the magnets. You can cut and measure using a ruler and your Exacto knife. Or, you can use my method and cut haphazardly with scissors. :)
 |
| Peel and stick rocks! |
A note on the magnets: The heavier your clothespin gets (with embellishments etc) the sturdier you are going to need your magnet to be. For my purposes these magnets, covering the whole back of the clothespin, keeps them securely on the fridge.
 |
| The magnet covers the entire back |
And here we are, all done!
 |
| Wrapping Paper Clip in Action! |
The Scrapbook paper clips:
 |
| Scrapbook Paper Clips |
The wrapping paper clips:
 |
| Wrapping paper! |
And now for the good, the bad, and the ugly of my project.
The Good:
1. These work up quickly - you can absolutely assembly line these and make dozens at a time.
2. There is a lot of versatility with materials - any kind of paper will work.
3. It's an inexpensive project - most of us have these materials hanging around. You can even make your own Mod Podge if you don't want to buy the brand name stuff. See recipe at the end!
4. These make great stocking stuffers for the holidays and can even be adapted to ornaments.
5. There are wicked huge clothespins at the craft store, they would be RAD to use!
The Bad:
1. The heavier embellishments require a stronger magnet. Stronger magnets may not be as "invisible" from the front.
2. Hot glue is messy. I would use epoxy next time if I decide to embellish them.
3. A sponge brush is better for Mod Podge/decoupaging than a bristle brush. I used what I had at hand. Next time I won't.
The Ugly:
1. The embellishments I had were perhaps not the best. I dared to be a little too funky with these. I actually prefer the plain paper clothespins, with the hardware showing. I think the charm of these is that they are clothespins and I don't want to hide that fact, even with really pretty paper.
2. Mod Podge smells FUNK-AY. Kind of like an old hotel room. Maybe mine is just old. Be sure you have good ventilation!
Mod Podge Recipe: (Oo, a tutorial in a tutorial! )
Water
Elmer's Glue
Empty jar
Simply fill the jar about halfway with equal parts of Elmer's glue and water. Close it up. Shake it up to mix and you're ready to go.

I hope you enjoyed the tutorial. Feel free to comment if you have questions or suggestions for future tutes. :D

xoxo
Comments
Post a Comment
♥ i really love comments! ♥