Well that post title almost has a sinister duality, doesn't it. lol.
Here's my tutorial on how I dyed fabric using Kool Aid. I've done several colors so far including pink, peach, blue, and purple. Today I wanted to do green as my previous attempt at green didn't come out well at all.
Here's what I use for supplies:
 |
| Supplies! |
1.
Unsweetened Kool Aid Packets -I used Blue Raspberry Lemonade, Lemon-Lime, & Strawberry Lemonade
2. Boiling water
3. White Vinegar
4. Whisk
5. Heat proof dish
6. Fabric for dyeing* -- I chose 100% cotton Aida cloth, and a 60/40 Cotton/Linen Blend.
*Note regarding fabric: I've read that Kool Aid dyeing is not suitable for protein based fabrics like cotton or linen as the color can wash out quickly.
Step 1: Boil enough water to cover the fabric while in the dish. I used about 2 cups.
Step 2: Pour the water into the empty dish.
Step 3: Pour packet powder into the dish. I used 1 entire lemon-lime packet, 1/2 packet of Blue Raspberry Lemonade, and 1/2 packet of Strawberry lemonade.
 |
| Lemon-Lime Hits Water |
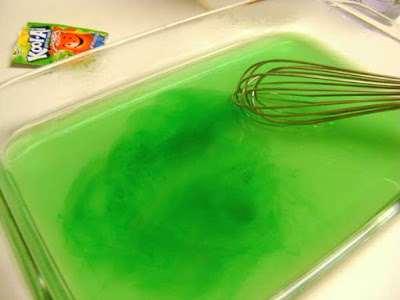
Step 4: Whisk thoroughly to fully dissolve powder. As you can see in the above picture it's really very bright green.. about the color of a 7 up bottle.
Step 5: Add secondary colors and whisk thoroughly.
 |
| Blue Raspberry is on the scene |
While it's hard to tell, that is, in fact, blue raspberry which is not really making the green less vibrant.
Step 6: Add tertiary colors and whisk thoroughly.
 |
| Strawberry Lemonade into the fray |
The addition of the reddish/yellow color will turn this more towards olive. Hopefully. **I add all the colors separately to make sure I'm happy with the color before proceeding.
Step 7: Add vinegar and whisk thoroughly to distribute. I used a "sploosh" (or 1/4 cup) for the 2 cups of water. This is where you lose the fruity smell and get a punch to the face with hot vinegar.
 |
| Hot vinegar stinks! |
Step 8: Add fabric.
 |
| Aida gets a green bath |
The Aida cloth was rinsed thoroughly in cold water to rinse away the stiffener. I frankly didn't notice much difference .. I think it's just a naturally dense, stiff fabric! Also, you'll notice my use of a chop stick there. (Yay for Pei Wei!) I make sure the fabric lays flat in it's bath and I don't use my hands because it's boiling water! ;)
Step 9: Wait!
 |
| Insert Jeopardy Theme |
Step 10: Become impatient and check your fabric.
 |
| Hmmm |
Step 11: Decide it's not taking the dye well and while it's still warm-ish throw in another layer of fabric.
I didn't want to waste the batch of dye so Step 11 is entirely optional. ;)
Step 12: Time's Up!
 |
| 90 minutes later... |
Step 13: Remove fabric to a clean bowl for rinsing.
 |
| Look at that gorgeous green! SQUEE! |
Step 14: Rinse well with cold water, which will remove the vinegar smell and some of the excess dye.
 |
| As you can see.. not much color came out. |
Step 15: Assess the pan!
 |
| Uh oh |
This pan has too much color left in it. My previous experience with this has shown me that this water should be nearly clear, meaning all the color has soaked into the cloth. This does not bode well for a decent green in the end. At this point you could boil this again and re-dye your fabric or just sally forth as I did.
Step 16: Dry the fabric. For Aida I simply laid it flat until it was dry. I was afraid to put it in the dryer with the cotton/linen.
 |
| Rinsed, but wet. |
At this point I was very pleased with my green cotton/linen but less so with the Aida. I'll wait to see them both fully dry before deciding though. I've noticed that applying heat can turn the color much more vibrant than it might be otherwise.
Step 17: Check your work.
 |
| Oh well.. |
As you can see.. the cloth on the farthest right is bright white.. that's what the Aida looked like before the Kool Aid Dye. The middle piece is the Aida.. which is a very pale minty green, which honestly doesn't look green unless you look at it against something white. The far left piece is the cotton/linen which has a very interesting greenish/reddish speckling to it. I'm not thrilled with the dried colors.. the wet were much prettier!
I'll be giving this yet another try because I really do enjoy coloring my own fabric.
Here are a few pics from my other Kool Aid dye atempts.
 |
| Ecru Cotton/Linen - Strawberry Lemonade |
 |
| Ecru Cotton/Linen - Blue Raspberry Lemonade |
 |
| Yep - it works on hair too! |
Despite the boo-boo face, my daughter loves her cherry red stripes. For dyeing her hair I simply filled a mug with boiling water, put some mix in it and dunked her hair in there for 5 minutes. This was done on 12/18 and while not as vibrant today.. she's definitely got stripes still.
 |
| Yep.. the dog too! lol |
Daisy did not want to be left out.. but only the very tip of her tail went into the mug and only for about 30 seconds. It washed out during her second trip to the dog park. ;)
To sum up...
The Good:
1. Somewhat inexpensive -the Kool Aid mix is about 18 cents a packet.
2. It doesn't take long and clean up is a breeze.
3. The possibilities for color variations is myriad. Experimenting is half the fun!
The Bad:
1. Results vary based on cloth type. It's hard to tell what the finished product will look like.
2. Since results vary you may wind up using more cloth and/or packets than you expected.
3. The dry powder will stain like crazy the second it hits anything wet (other than the dish of course) so be careful with it. I don't use gloves or put newspaper down on the surface, but I'm a risk taker that way.
The Ugly:
1. The green color I wound up with this time around. Just sayin'.
Hope this was helpful! I'm not an expert, but I'll try to answer questions if you have any.
Happy dyeing!
xo

 Here's my tutorial on how I dyed fabric using Kool Aid. I've done several colors so far including pink, peach, blue, and purple. Today I wanted to do green as my previous attempt at green didn't come out well at all.


